
schluter thermostat manual
Need help with your Schluter thermostat? Download easy-to-follow manuals & troubleshooting guides right here! Get your heating system working perfectly. **Schluter Thermostat**.
Schluter Thermostat Manual: A Comprehensive Guide
Schluter systems, including thermostats, demand precise installation for optimal performance; this guide details KERDI and DITRA-HEAT integration, ensuring waterproof, heated floors․
Schluter Systems has become a leading innovator in tile installation solutions, renowned for its commitment to waterproofing, uncoupling, and radiant heating technologies․ At the heart of their heating offerings lies the Schluter-DITRA-HEAT system, a sophisticated electric floor warming solution designed for comfort and efficiency․ This system relies heavily on precise thermostat control to deliver consistent and reliable performance․
Schluter thermostats aren’t simply temperature regulators; they are integral components of a fully integrated system․ They work in conjunction with the DITRA-HEAT membrane and other Schluter products to create a durable, waterproof, and energy-efficient floor warming experience․ Understanding the nuances of these thermostats – from wiring to programming – is crucial for a successful installation and long-term satisfaction․ This guide will provide a comprehensive overview of Schluter thermostats, covering everything from basic operation to advanced troubleshooting․
Understanding the Schluter-DITRA-HEAT System
The Schluter-DITRA-HEAT system is a comprehensive electric floor warming solution built around a decoupling membrane and precise temperature control․ The DITRA membrane not only uncouples the tile covering from the substrate, preventing cracking, but also provides a secure bed for the heating cables․ This system’s efficiency is maximized through accurate thermostat regulation, ensuring consistent warmth without energy waste․
Unlike traditional radiant heating, DITRA-HEAT offers a relatively simple installation process, particularly for smaller areas․ The system’s responsiveness to thermostat adjustments allows for customized comfort levels․ Proper installation, including correct sensor placement and wiring, is paramount for optimal performance․ The KERDI waterproofing membrane often integrates seamlessly with DITRA-HEAT, creating a fully protected and comfortable flooring solution․
Components of the Schluter-DITRA-HEAT System
The Schluter-DITRA-HEAT system comprises several key elements working in harmony․ Central to the system is the DITRA-HEAT membrane itself, providing decoupling and cable pathways․ Heating cables, available in various lengths, are embedded within the membrane to deliver consistent warmth․ A crucial component is the Schluter thermostat, controlling temperature and energy consumption․
Furthermore, the system often incorporates a floor sensor for accurate temperature monitoring and feedback to the thermostat․ Schluter-KERDI waterproofing membrane is frequently used in conjunction, especially in wet areas like showers․ Connecting wires and specialized accessories ensure secure and reliable electrical connections․ Proper selection and integration of these components are vital for a functional and long-lasting heated floor system․
DITRA-HEAT Membrane

The Schluter-DITRA-HEAT membrane is a polyethylene decoupling layer designed with a grid pattern for precise heating cable placement․ This uncoupling minimizes stress from substrate movement, preventing cracks in tile and grout․ Its waterproof vapor barrier protects underlying structures from moisture․ The membrane’s fleece backing ensures strong adhesion with thin-set mortar․
Integrated channels securely hold the heating cables, distributing warmth evenly across the floor․ Available in various sheet sizes, DITRA-HEAT simplifies installation and accommodates different room layouts․ It’s compatible with diverse flooring materials, including tile, stone, and wood․ Proper installation, following Schluter’s guidelines, is crucial for optimal performance and longevity of the heating system․
Thermostat Options: Schluter-THERMOSTAT-E & Others
Schluter offers a range of thermostats to control the DITRA-HEAT system, with the THERMOSTAT-E being a popular choice․ This electronic thermostat features a user-friendly interface, programmable schedules, and precise temperature control․ Other options include models with remote control capabilities and advanced features like floor sensor monitoring․
Choosing the right thermostat depends on individual preferences and the complexity of the heating zone․ Compatibility with the DITRA-HEAT system is essential․ Schluter’s thermostats are designed for seamless integration, ensuring efficient and reliable operation․ Always consult the product specifications to determine the appropriate thermostat for your specific needs and installation requirements․
Schluter-THERMOSTAT-E: Features and Specifications
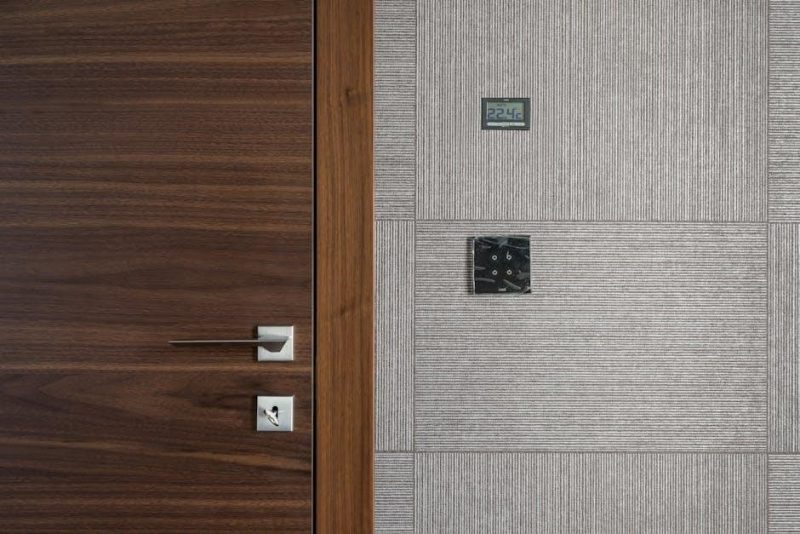
The Schluter-THERMOSTAT-E is a sophisticated electronic thermostat designed for precise floor heating control․ Key features include a large, backlit LCD screen for easy readability, programmable weekly schedules with multiple time periods, and a built-in ground fault circuit interrupter (GFCI) for enhanced safety․
Specifications include a voltage of 120V, a maximum load of 15 amps, and a temperature range of 35°F to 86°F (2°C to 30°C)․ It’s compatible with DITRA-HEAT floor heating cables and mats, utilizing a floor sensor for accurate temperature monitoring․ The thermostat also boasts a sleek, modern design suitable for various bathroom aesthetics, ensuring both functionality and style․
Installation Prerequisites: Subfloor Preparation
Proper subfloor preparation is crucial for a successful Schluter-DITRA-HEAT installation․ The subfloor must be structurally sound, clean, dry, and free of loose particles, paint, or adhesive residue․ Any cracks or unevenness exceeding 3/16” (5 mm) should be leveled with a suitable patching compound․
Ensure the subfloor is adequately reinforced to support the weight of the tile, mortar, and heating system․ For concrete subfloors, moisture content should be within acceptable limits, typically below 3 lbs per 1000 sq ft over 24 hours․ A self-leveling underlayment may be necessary to create a perfectly flat surface for optimal DITRA membrane adhesion and heat distribution․
Wiring the Schluter Thermostat
Schluter thermostat wiring requires strict adherence to electrical codes and safety guidelines․ Always disconnect power at the breaker before commencing any electrical work․ The thermostat typically utilizes low-voltage wiring for control signals and requires a dedicated circuit for the heating cables․
Carefully follow the wiring diagram provided with your specific THERMOSTAT model – THERMOSTAT-E or others․ Correctly connect the floor sensor, heating cables, and power supply, ensuring secure connections․ Improper wiring can damage the thermostat or create a safety hazard․ Grounding is essential for safe operation; consult a qualified electrician if unsure․
Electrical Safety Considerations
Schluter DITRA-HEAT systems involve electrical components; therefore, prioritizing safety is paramount․ Always disconnect power at the circuit breaker before undertaking any wiring or installation tasks․ Employ a Ground Fault Circuit Interrupter (GFCI) outlet for the dedicated circuit powering the system, providing crucial protection against electrical shock․
Ensure all wiring complies with local and national electrical codes․ Never work with wet hands or in damp environments․ If you lack experience with electrical work, consult a qualified and licensed electrician․ Improper installation can lead to fire hazards or electrical shock, voiding warranties and endangering occupants․
Connecting to Power Supply
Before connecting the Schluter thermostat to the power supply, double-check that the circuit breaker is OFF․ Utilize appropriately sized wiring, adhering to local electrical codes, to connect the thermostat to the dedicated GFCI-protected circuit․ Typically, this involves connecting line (hot), neutral, and ground wires to the designated terminals on the thermostat’s wiring block․
Ensure secure connections, avoiding loose wires․ A properly grounded connection is vital for safety․ After wiring, carefully inspect all connections before restoring power․ If unsure about any aspect of the connection process, consult a qualified electrician to prevent electrical hazards and ensure system functionality․
Programming the Schluter Thermostat
Schluter thermostats, like the THERMOSTAT-E, offer programmable features for customized heating schedules․ Access the programming mode via the thermostat’s interface, typically involving button presses and screen navigation․ Define different temperature setpoints for various times of day and days of the week to optimize comfort and energy efficiency․
Consider creating schedules that lower temperatures during unoccupied periods or overnight․ Familiarize yourself with the thermostat’s hold functions for temporary overrides․ Accurate floor sensor placement and calibration are crucial for precise temperature control; refer to the manual for specific instructions on these processes․
Setting Temperature Schedules
Schluter thermostats empower users to establish personalized heating schedules, maximizing both comfort and energy savings․ Begin by defining distinct periods – for example, ‘Wake,’ ‘Away,’ ‘Return,’ and ‘Sleep’ – each corresponding to different occupancy patterns․ Assign desired temperatures to each period; a warmer setting for ‘Wake’ and ‘Return,’ and cooler settings for ‘Away’ and ‘Sleep’ are common․
Program these periods for each day of the week, accommodating weekend variations․ Explore features like ramp-up times, allowing the floor to gradually reach the set temperature․ Regularly review and adjust schedules based on seasonal changes and personal preferences to maintain optimal performance․

Floor Sensor Placement & Calibration
Accurate floor sensor placement is crucial for precise temperature control with Schluter’s DITRA-HEAT system․ Embed the sensor between heating cables, approximately midway between them, ensuring it’s fully encapsulated within the thin-set mortar․ Avoid placing it too close to walls or heating cables, as this can lead to inaccurate readings․
Calibration is essential․ After installation, verify the sensor’s reading against a calibrated thermometer․ If discrepancies exist, utilize the thermostat’s calibration function to adjust the sensor’s output, ensuring the system accurately reflects the floor temperature․ Proper placement and calibration guarantee efficient and comfortable heating․

Troubleshooting Common Issues
Addressing issues promptly ensures your Schluter thermostat functions optimally․ If the thermostat isn’t powering on, check the circuit breaker and wiring connections․ Verify the power supply voltage matches the thermostat’s requirements․ For heating not activating, confirm the floor sensor is correctly connected and calibrated; a faulty sensor can prevent operation․
Review programming settings – an incorrect schedule or low temperature setting could be the cause․ Inspect for tripped ground fault circuit interrupters (GFCIs)․ If problems persist, consult the Schluter documentation or contact technical support for assistance, providing detailed information about the issue․

Thermostat Not Powering On
When your Schluter thermostat fails to power on, begin with the simplest checks․ First, verify the circuit breaker supplying power to the thermostat hasn’t tripped․ Inspect all wiring connections at the thermostat and power supply, ensuring they are secure and undamaged․ Confirm the voltage supplied matches the thermostat’s specified requirements – incorrect voltage can prevent operation․
Check for any loose connections or damaged wires․ A multimeter can help determine if power is reaching the thermostat․ If the issue persists after these checks, consult the Schluter manual or contact technical support for further diagnosis․
Heating Not Activating
If your Schluter thermostat powers on but the heating isn’t activating, several factors could be at play․ First, ensure the thermostat is correctly programmed with a desired temperature setting and schedule․ Verify the floor sensor is properly connected and calibrated, as an improperly placed or functioning sensor can prevent heating activation․
Check the heating cable or mat for any breaks or damage․ A faulty heating element won’t generate heat․ Confirm the thermostat’s output is signaling the heating system to turn on․ If problems continue, review the Schluter documentation or reach out to their technical support team for assistance․
Schluter-KERDI and its Role in Waterproofing
Schluter-KERDI is a bonded waterproofing membrane crucial for creating a watertight envelope, especially when integrating with heated flooring systems like DITRA-HEAT․ It’s applied directly to the substrate using a polymer-modified thin-set mortar, forming a seamless barrier against moisture penetration․ Proper KERDI installation is paramount, involving overlapping seams and meticulous detailing around penetrations․
This membrane isn’t just for showers; it’s applicable to any area needing waterproofing․ When combined with Schluter drains, like the KERDI-DRAIN, a complete and reliable waterproofing system is achieved, protecting both the structure and the heating components from water damage․
Integrating KERDI with DITRA-HEAT
Successfully combining Schluter-KERDI waterproofing with DITRA-HEAT radiant floor heating requires a systematic approach․ The DITRA-HEAT membrane provides uncoupling and heating cable management, while KERDI ensures a watertight seal․ Installation begins with a properly prepared subfloor, followed by the DITRA-HEAT installation, and then the KERDI membrane is bonded over it․
Critical attention must be paid to transitions and penetrations, utilizing Schluter’s sealing solutions․ This integrated system delivers both comfort and protection, safeguarding the heating elements and the building structure from moisture․ Proper sequencing is key to a durable, functional, and waterproof heated floor․
Waterproofing Around the Thermostat
Achieving a watertight seal around the Schluter thermostat is paramount․ The KERDI membrane must be meticulously applied, extending seamlessly behind the thermostat’s mounting location․ Utilize Schluter-KERDI-BAND for reinforcing corners and transitions, ensuring complete coverage․ Precise cuts and overlaps are essential to prevent water ingress․

Avoid applying thin-set directly to the thermostat’s electrical components․ Instead, create a secure mechanical bond with the KERDI membrane․ Pay close attention to the wiring entry points, sealing them with appropriate Schluter sealant․ This careful detailing safeguards the electrical system and maintains the integrity of the waterproofing envelope․
Schluter-KERDI-DRAIN Installation
The Schluter-KERDI-DRAIN is a crucial component, establishing a watertight connection between the shower floor and the KERDI waterproofing membrane․ Installation begins with properly sloping the mortar bed to ensure efficient water drainage towards the drain․ The KERDI-DRAIN flange is then embedded within the mortar, creating a secure mechanical bond․
Carefully apply KERDI membrane over the drain flange, ensuring a complete and seamless seal․ Utilize Schluter-KERDI-BAND to reinforce the connection and prevent water penetration․ Proper bonding with thin-set mortar is vital for long-term performance․ A correctly installed KERDI-DRAIN prevents leaks and maintains the integrity of the shower system․
Using Schluter Shower Systems with Thermostats
Integrating a Schluter thermostat within a complete Schluter Shower System maximizes comfort and efficiency․ The system, featuring KERDI waterproofing and DITRA-HEAT, provides a foundation for even heat distribution․ Precise placement of the floor sensor is critical for accurate temperature control, ensuring consistent warmth across the shower floor․
Waterproofing around the thermostat requires careful attention to detail, utilizing KERDI-BAND and appropriate thin-set mortar․ The integrated system minimizes the risk of water damage and enhances the longevity of the heating elements․ Proper installation guarantees a luxurious and reliable heated shower experience․
Maintenance and Care of Schluter Thermostats
Regularly inspect your Schluter thermostat for proper operation and clear error messages․ Avoid using abrasive cleaners on the thermostat’s surface; a damp cloth is sufficient for cleaning․ Periodically check the floor sensor cable for any signs of damage or disconnection, as this impacts heating performance․
Ensure the thermostat is protected from direct water exposure, even within a waterproofed shower environment․ Familiarize yourself with the thermostat’s self-diagnostic features to quickly identify and address potential issues․ Following these simple maintenance steps will prolong the lifespan and efficiency of your Schluter heating system․
Warranty Information for Schluter Products

Schluter Systems offers varying warranties depending on the product line․ DITRA-HEAT and thermostats typically carry a limited lifetime warranty against defects in materials and workmanship, provided proper installation guidelines are strictly followed․ The KERDI waterproofing membrane also benefits from a similar long-term warranty․
However, warranty coverage is contingent upon using genuine Schluter components and adhering to their installation instructions․ Documentation, including proof of purchase and installation details, is crucial for any warranty claim․ Visit the Schluter website or contact technical support for the most current and detailed warranty information specific to your product․
Resources and Support
Schluter provides extensive resources to assist with DITRA-HEAT and thermostat installations․ Their official website (www․schluter․com) hosts detailed product documentation, including installation guides, technical data sheets, and troubleshooting tips․ Numerous how-to videos demonstrate proper techniques for various applications․
For personalized assistance, Schluter’s technical support team is readily available․ You can reach them via phone or email to address specific questions or concerns regarding your project․ Additionally, a network of authorized Schluter dealers can offer expert advice and product selection guidance․ Utilizing these resources ensures a successful and warrantied installation․
Schluter Website & Documentation
The official Schluter website (www․schluter․com) serves as a central hub for all things related to their products, including comprehensive documentation for DITRA-HEAT and thermostats․ Users can access detailed installation manuals, technical datasheets outlining specifications, and helpful system diagrams․
Schluter’s online resource library features a wealth of information, including how-to videos demonstrating proper installation techniques․ These visual guides are invaluable for understanding complex procedures․ Furthermore, downloadable PDFs provide in-depth explanations of system components and troubleshooting advice, ensuring a smooth and successful installation process․
Contacting Schluter Technical Support
For personalized assistance with your Schluter thermostat or DITRA-HEAT system, reaching out to their technical support team is highly recommended․ Schluter provides multiple avenues for contact, including a dedicated phone line where experienced professionals can address your specific questions and concerns․
Additionally, you can submit inquiries via email through the Schluter website, allowing for detailed explanations and potential image submissions for clearer understanding․ Their support team is known for its responsiveness and expertise, offering guidance on installation, troubleshooting, and warranty claims․ Don’t hesitate to leverage this valuable resource for a successful project․