
hole saw guide
Struggling with wobbly hole saw drilling? Find the perfect **hole saw guide** at Yewplay! Achieve clean, accurate holes every time – easy projects & pro results.
Hole saws are circular cutting tools, attached to drills, creating precise round holes in diverse materials like wood, metal, and plastics for various applications.
What is a Hole Saw?
A hole saw is fundamentally a circular saw blade, designed to be attached to a standard drill. Unlike traditional drill bits that create holes by removing material within the bit’s diameter, a hole saw cuts a circular groove around the desired hole’s perimeter.
This unique cutting action results in a clean, precise hole, making it ideal for applications where a neat finish is crucial. The saw consists of a cylindrical blade with teeth, and a pilot drill bit positioned at the center. The pilot bit guides the saw and centers the cut.
These tools are incredibly versatile, capable of cutting through wood, plastic, soft plaster, metal, brick, concrete, glass, and stone – depending on the type of teeth employed, as we will explore further.
Applications of Hole Saws
Hole saws boast a remarkably broad range of applications across numerous trades and DIY projects. A common use is drilling holes for cable routing and wiring runs within walls and floors, ensuring a tidy and professional installation.
They are also frequently employed for making cutouts in ceilings for downlights, providing a precise opening for recessed lighting fixtures. Beyond electrical work, hole saws are invaluable for plumbing, creating holes for pipes and fixtures.
Furthermore, they excel in installing door hardware, creating perfectly sized holes for locks and knobs. Depending on the saw type, they can even tackle more demanding tasks like drilling into masonry for anchors or creating access points in various materials.

Types of Hole Saws
Hole saws come in several varieties – bi-metal, tungsten carbide tipped, and diamond tipped – each designed for specific materials and cutting needs.
Bi-Metal Hole Saws
Bi-metal hole saws are a popular and versatile choice, constructed with a high-speed steel cutting edge welded to a more flexible backing steel body. This combination provides both durability and resistance to breakage, making them suitable for a wide range of materials.
They excel at cutting through wood, aluminum, and thinner metals, offering a good balance between performance and cost-effectiveness. The two-metal construction allows for some flex, reducing the risk of shattering when encountering nails or other obstructions. For example, bi-metal saws are particularly useful when drilling through wood or aluminum, offering reliable performance in these applications. They are a go-to option for many general-purpose drilling tasks around the home or workshop.
Tungsten Carbide Tipped Hole Saws
Tungsten carbide tipped hole saws represent a significant upgrade in durability and cutting performance, especially when dealing with abrasive materials. These saws feature a tungsten carbide cutting edge, known for its exceptional hardness and wear resistance, brazed onto a steel body.
They are ideal for cutting through harder materials like stainless steel, cast iron, and even some types of hardened plastics. A universal hole saw with tungsten carbide teeth can efficiently cut wood, chipboard, MDF, plasterboard, plastic, and wall tiles with minimal heat generation. This makes them a preferred choice for professionals requiring long-lasting and reliable cutting power in demanding applications. They offer a faster cutting experience and extended lifespan compared to bi-metal alternatives.
Diamond Tipped Hole Saws
Diamond tipped hole saws are specifically engineered for tackling extremely hard and brittle materials where traditional hole saws would quickly fail. These saws utilize industrial-grade diamonds bonded to a steel core, providing unparalleled cutting ability through substances like granite, slate, glass, ceramic tile, and concrete.
They excel in applications such as drilling through masonry for plumbing or electrical runs, creating precise openings in glass for fixtures, and working with delicate tile without causing cracking or chipping. Diamond-tipped saws offer clean, accurate cuts and a prolonged lifespan, making them a valuable investment for professionals and DIY enthusiasts alike. They are essential when dealing with materials that saw teeth simply cannot penetrate effectively.
Multi-Purpose Hole Saw Sets
Multi-purpose hole saw sets represent a cost-effective and versatile solution for users who frequently work with a variety of materials. These comprehensive kits typically include a range of hole saw sizes and often incorporate different blade types to accommodate wood, plastic, metal, and even some masonry applications.
Designed for adaptability, these sets aim to minimize the need for purchasing individual specialized saws. They are ideal for general home improvement projects, installations, and repairs where material changes are common. While they may not match the performance of dedicated saws on specific materials, they provide a convenient all-in-one package for tackling diverse cutting tasks efficiently and economically.

Choosing the Right Hole Saw
Selecting the correct hole saw depends on the material you’re cutting and the desired hole size, ensuring efficient and clean results for your project.
Material Compatibility
Understanding material compatibility is crucial when selecting a hole saw. Standard saw teeth excel at cutting wood, plastic, soft plaster, and even some metals, offering versatility for common projects. However, harder materials demand specialized solutions.
For robust materials like brick, concrete, glass, and stone, diamond-tipped hole saws are essential, providing the necessary abrasive power to penetrate these surfaces effectively. Bi-metal hole saws, featuring two types of steel, are particularly useful when working with wood or aluminum, offering a balance of durability and cutting performance.
Multi-purpose sets aim to cover a broader range, handling wood, plastic, metal, and masonry, but may compromise on optimal performance for each specific material. Always verify the hole saw’s specifications to ensure it’s designed for the material you intend to cut, preventing damage to both the tool and the workpiece.
Hole Size Selection
Choosing the correct hole size is the foundational step for any successful project. Carefully measure the required diameter of the hole, accounting for any necessary clearances or tolerances. Hole saws are available in a vast range of sizes, from small diameters for wiring to larger sizes for plumbing or installing fixtures.
Consider the application; for cable routing, precise sizing is vital, while downlight cutouts may allow for slight adjustments. Multi-purpose sets often include a selection of common sizes, offering convenience for general use. If your desired size isn’t included in a set, individual hole saws can be purchased.
Always double-check the hole saw’s markings before drilling to avoid errors. A slightly oversized hole can be problematic, while an undersized hole requires further modification.

Using a Hole Saw: A Step-by-Step Guide
Proper technique involves securing the workpiece, starting slowly, applying consistent pressure, and maintaining a perpendicular angle for clean, accurate holes.
Safety Precautions
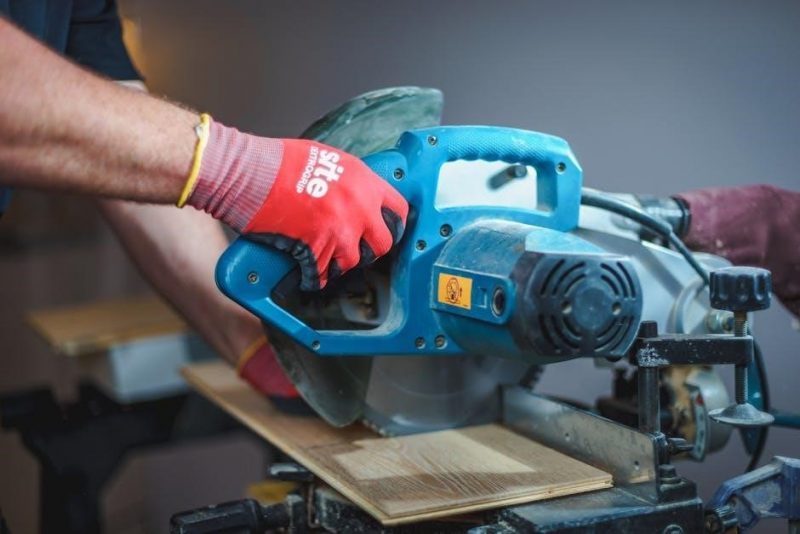
Prioritize safety when operating a hole saw. Always wear safety glasses to protect your eyes from flying debris, as cutting generates particles. Gloves are recommended to improve grip and shield hands. Ensure the workpiece is firmly clamped to prevent movement during drilling, reducing the risk of injury.
Disconnect power before changing bits or making adjustments. Be mindful of hidden wiring or plumbing within walls or floors before drilling. Use a slow speed initially to establish a pilot hole and maintain control. Avoid excessive force, letting the saw do the work. Never attempt to stop a rotating hole saw with your hand; allow it to come to a complete stop naturally.
Inspect the saw for damage before each use, discarding any cracked or worn blades. Understand the material you are cutting and select the appropriate hole saw type for optimal safety and performance.
Preparing the Workpiece
Proper preparation is crucial for clean, accurate holes. Securely clamp the workpiece to a stable surface – a vise or workbench is ideal – preventing movement during drilling. Mark the precise center of the desired hole location with a punch or marker, ensuring accuracy.
For smooth materials like tile or glass, apply masking tape over the drilling area to prevent chipping and provide a better starting point. If drilling into walls, carefully assess for hidden wiring or plumbing using a stud finder or appropriate detection tools. Consider using a sacrificial backer board to minimize tear-out on the exit side of the hole.
Pilot holes are often beneficial, especially for larger diameter cuts, guiding the hole saw and improving accuracy. Ensure the workpiece is adequately supported to prevent sagging or vibration during the drilling process.
Drilling Techniques
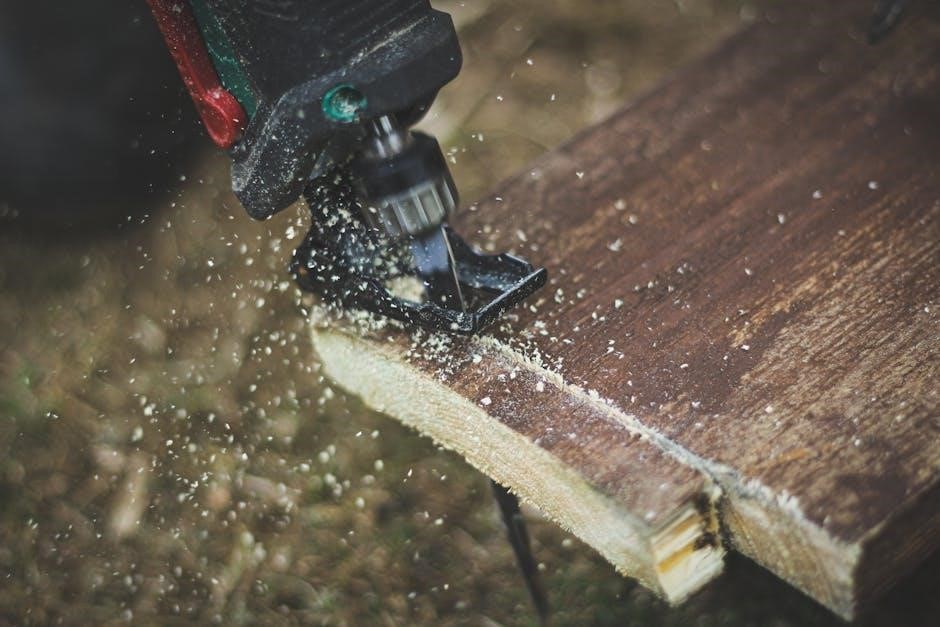
Start slowly, applying gentle pressure to establish a pilot cut. Maintain a consistent, moderate speed throughout the drilling process, avoiding excessive force which can damage the saw or workpiece. Use a pecking motion – drilling a short distance, retracting, and repeating – particularly with deeper holes, to clear chips and reduce heat buildup.
Keep the hole saw perpendicular to the workpiece surface for a clean, round hole. Avoid twisting or wobbling the drill. For metal, a cutting fluid can significantly improve performance and extend the life of the saw. Continuously monitor the cutting process, listening for changes in sound that might indicate binding or resistance.
As you near breakthrough, reduce pressure to prevent splintering or damage to the back surface; Support the workpiece to minimize tear-out.
Hole Saw Guides: Enhancing Accuracy
Hole saw guides provide stability and precision during drilling, ensuring accurate hole placement and minimizing wandering, especially crucial for repetitive or critical applications.
Types of Hole Saw Guides
Various hole saw guides cater to different needs and applications, enhancing drilling accuracy. Simple plastic guides offer basic centering and support, ideal for occasional use and softer materials. T-slot guides, designed for drill press tables, provide exceptional stability and precise control, perfect for repetitive tasks.
Self-centering guides feature a pilot drill bit to initiate the cut and maintain alignment, simplifying the process. Adjustable guides allow for customizing the hole diameter, offering versatility for different project requirements. Furthermore, specialized guides exist for specific materials like tile or glass, ensuring clean cuts and preventing chipping. Choosing the right guide depends on the material, desired precision, and frequency of use, ultimately improving the quality and efficiency of your drilling work.
Benefits of Using a Guide
Employing a hole saw guide significantly improves drilling precision and safety. Guides prevent the saw from wandering, resulting in cleaner, more accurate holes, especially crucial for fitted applications. They minimize the risk of kickback, a dangerous occurrence where the saw abruptly jerks, potentially causing injury or damage.
A guide also reduces material splintering and chipping, particularly important when working with delicate surfaces like tile or glass. Furthermore, guides enhance control, allowing for consistent hole placement and depth. This is invaluable for projects requiring multiple, identically sized holes. Ultimately, a hole saw guide elevates the quality of your work, saves time, and promotes a safer working environment for both novice and experienced users.

Maintaining Your Hole Saws

Regular cleaning after each use prevents material buildup, while proper storage protects teeth. Sharpening, if possible, restores cutting efficiency and extends lifespan.
Cleaning and Storage
Consistent cleaning is paramount for maintaining hole saw performance and longevity. Immediately after each use, remove any accumulated debris – wood chips, metal shavings, or plaster dust – using a stiff brush or compressed air. This prevents material from hardening within the teeth, hindering future cuts.
Proper storage is equally crucial. Avoid simply tossing hole saws into a toolbox where they can be damaged by contact with other tools. Ideally, store them in a dedicated holder or case, protecting the teeth from dulling or chipping. Consider applying a light coat of oil to the teeth to prevent rust, especially in humid environments. Keeping your hole saws clean and well-protected ensures they remain ready for precise and efficient cutting whenever you need them.

Sharpening (If Applicable)
Not all hole saws require sharpening; tungsten carbide and diamond-tipped varieties generally don’t, as their hardness maintains a cutting edge for extended periods. However, bi-metal hole saws, with their high-speed steel teeth, can benefit from occasional sharpening to restore performance.
Sharpening requires specialized tools and a steady hand. A round file, matching the tooth angle, is typically used to carefully reshape the cutting edges. It’s vital to maintain the original tooth geometry to ensure clean, accurate cuts. If you lack experience, professional sharpening services are recommended. Attempting to sharpen incorrectly can damage the saw, rendering it unusable. Regular cleaning and proper storage often extend the life of bi-metal saws, minimizing the need for sharpening.

Troubleshooting Common Issues
Common problems include saw binding during cuts and chipped teeth, often due to excessive pressure or incorrect speed; address these for optimal performance.
Saw Binding
Saw binding occurs when the hole saw becomes stuck within the material being cut, hindering progress and potentially damaging both the saw and the workpiece. This frequently happens due to several factors, including applying too much pressure during the drilling process, using an incorrect drilling speed – often too slow – or encountering dense, unforgiving materials.
To resolve binding, immediately stop the drill and attempt to reverse the rotation to free the saw. Avoid forcing it, as this can worsen the situation. Reducing drilling speed and applying a lubricant, like cutting oil, can also help alleviate friction. Ensuring the material is securely clamped and properly supported is crucial to prevent movement that contributes to binding. Regularly clearing chips from within the cut also aids in smoother operation and reduces the likelihood of the saw becoming lodged.
Chipped Teeth
Chipped teeth on a hole saw significantly diminish its cutting efficiency and accuracy, leading to rough, uneven holes and increased strain on the drill. This damage typically results from using the saw on materials it wasn’t designed for, such as attempting to cut hardened steel with a wood-cutting saw, or from excessive force during operation. Impact with rebar within concrete can also cause chipping.
Minor chipping can sometimes be addressed with careful sharpening, though extensive damage usually necessitates replacement. Prevention is key: always select the appropriate hole saw for the material, maintain a consistent drilling speed, and avoid applying excessive pressure. Inspect the saw’s teeth regularly for any signs of wear or damage, and discontinue use if significant chipping is observed to prevent further complications and ensure safe operation.

Advanced Techniques
Mastering hole saws involves techniques like cutting overlapping holes for larger openings or utilizing a drill press for enhanced precision and control.
Cutting Overlapping Holes
Creating larger, irregularly shaped openings often requires cutting overlapping holes with a hole saw. This technique demands careful planning and execution to achieve a clean, accurate result. Begin by outlining the desired shape on the workpiece, then strategically position the hole saw for the first cut, ensuring sufficient overlap with the subsequent cuts.
Gradually move the hole saw, overlapping each cut by approximately 50%, to avoid creating sharp corners or leaving unwanted material. Maintaining a consistent speed and applying even pressure are crucial throughout the process. For complex shapes, consider using multiple hole saw sizes to navigate tight curves and intricate details. Remember to prioritize safety by securing the workpiece firmly and wearing appropriate protective gear.
Using Hole Saws with a Drill Press
Employing a drill press significantly enhances accuracy and control when using hole saws, particularly for demanding applications. Securely mount the workpiece to the drill press table, ensuring it’s firmly clamped to prevent movement during operation. Select a slow to medium speed setting on the drill press, as excessive speed can generate heat and damage the hole saw.
Carefully align the hole saw with the desired cutting location and slowly lower the drill press quill, applying consistent pressure. Avoid forcing the cut; let the hole saw do the work. Regularly clear chips and debris from the cutting area to maintain optimal performance. Utilizing a drill press provides superior stability and precision, resulting in cleaner, more accurate holes.