

tmy projector manual
Lost your Tmy projector manual? Don't worry! We've got you covered with easy-to-download manuals for all models. Get back to enjoying movies & games! **Tmy projector**.
TMY Projector Manual: A Comprehensive Guide
Welcome! This manual details the TMY V58 & V08 projectors, covering setup, features, troubleshooting, and care. Explore optimal viewing with 7500 Lumens and 1080P support.
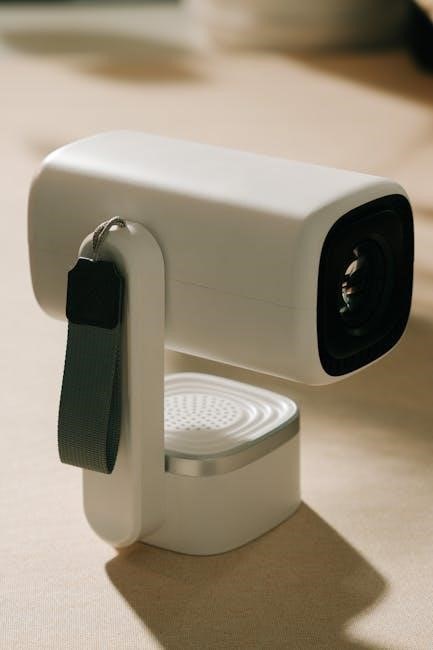
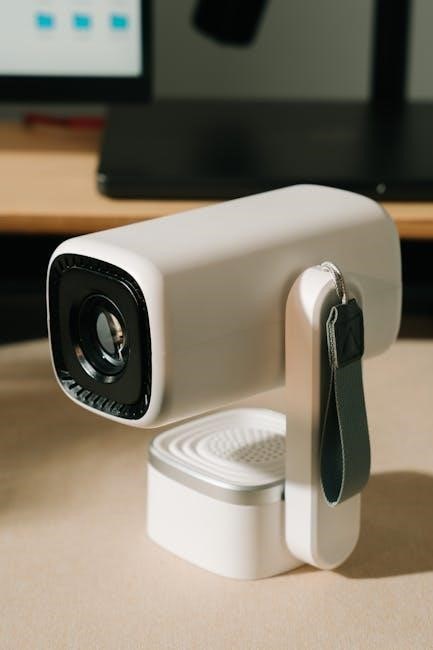
TMY Projectors are designed to bring a cinematic experience to any space, offering a blend of portability and performance. Focusing on models like the V58 and V08, TMY aims to provide accessible home entertainment solutions. These projectors utilize LED technology and boast impressive brightness, often advertised around 7500 Lumens, ensuring a clear and vibrant image even in moderately lit rooms.
The appeal of TMY projectors lies in their versatility. They are easily connectable to a wide range of devices – smartphones, tablets, PCs, and TV sticks – making them ideal for both presentations and leisure viewing. The compact design of the V08, in particular, highlights its portability, while the V58 offers a more comprehensive multimedia experience. This manual will guide you through maximizing your TMY projector’s capabilities, from initial setup to advanced troubleshooting.
Understanding the TMY V58 Model
The TMY V58 is a multimedia projector designed for convenient display and versatile use. It’s positioned as a user-friendly option for home theaters and presentations, supporting 1080P Full HD resolution for a detailed viewing experience. While specific details beyond this are limited in readily available information, the V58 distinguishes itself through its compatibility with various input sources.
Users can expect a projector capable of connecting to smartphones, tablets, PCs, and TV sticks, offering flexibility in content delivery. The advertised 7500 Lumens brightness suggests suitability for rooms where complete darkness isn’t achievable. The V58’s design prioritizes ease of use, making it accessible to a broad range of users. Remote control compatibility extends to brands like Blitzwolf, 3Stone, and WEWATCH, enhancing user convenience. Further details regarding specific features and specifications are covered in subsequent sections of this manual.

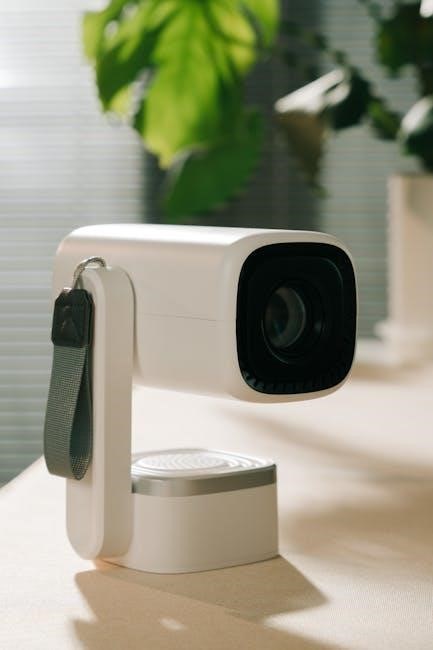
TMY V08 Projector Overview
The TMY V08 is presented as a mini LED LCD projector boasting 7500 Lumens, designed for portability and ease of use. It’s a compact option suitable for smaller spaces or on-the-go entertainment. Available online, including on Amazon, the V08 supports 1080P Full HD, promising a clear picture despite its miniature size.
This model emphasizes connectivity, readily linking to smartphones, tablets, PCs, and TV sticks. It’s marketed as offering three times clearer image quality. The V08 is often sold as a package including a projector screen. Some listings specify it as unused, while others offer it without a remote control, though compatibility with various remotes (Blitzwolf, 3Stone, WEWATCH) exists. Its 100-240V power supply makes it adaptable for international use. The V08 represents an affordable entry point into portable projection technology.
Key Features of TMY Projectors (Based on V58 & V08)
TMY projectors, exemplified by the V58 and V08 models, prioritize portability and user-friendliness. A core feature is their brightness, advertised at 7500 Lumens, aiming to deliver a visible image even in moderately lit environments. Both models support 1080P Full HD resolution, enhancing picture clarity and detail.

Connectivity is a key strength, with options for USB, smartphone, tablet, PC, and TV stick integration. The V08 specifically highlights easy connection to these devices. Utilizing LCD technology, TMY projectors offer a balance between image quality and affordability. Furthermore, remote control compatibility extends beyond dedicated TMY remotes, including options from Blitzwolf, 3Stone, and WEWATCH, providing user convenience. These projectors are designed for versatile use, from home entertainment to presentations.
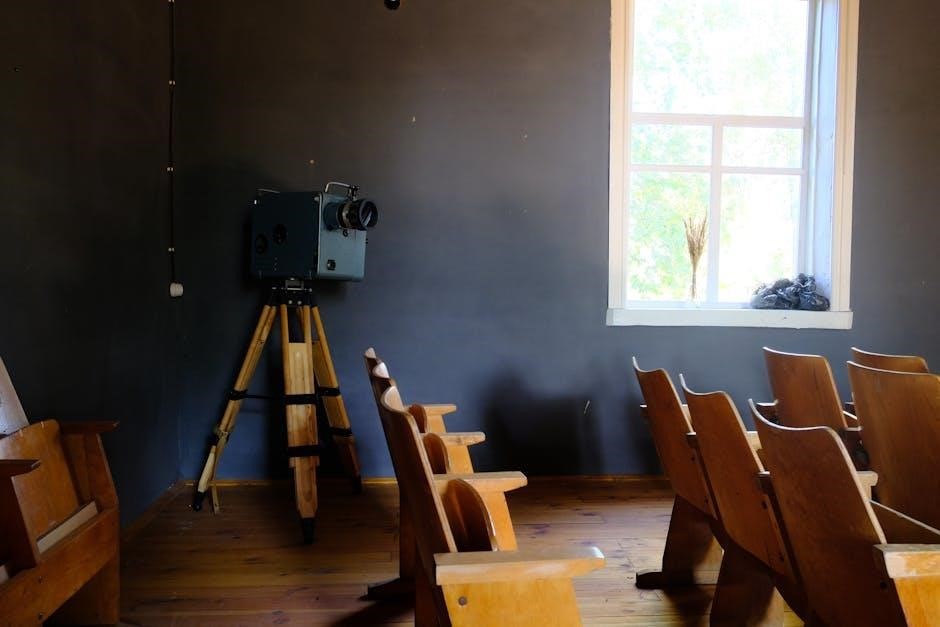
Setting Up Your TMY Projector
Initial setup is straightforward. Begin by carefully unpacking your TMY projector (V58 or V08) and ensuring all components are present. Position the projector on a stable, level surface, considering the desired projection distance and screen size. Connect the power adapter and ensure the voltage (100-240V) is compatible with your local supply.
Before powering on, familiarize yourself with the ports located on the projector – USB, HDMI (if applicable), and potentially a 3.5mm audio output. Connecting devices before powering on can streamline the process. The V08 model is designed for easy connectivity to smartphones, tablets, PCs, and TV sticks. Adjust the focus ring to achieve a sharp image. Proper setup is crucial for optimal performance and enjoyment of your TMY projector.
Initial Setup and Powering On
Powering on your TMY projector is simple. After ensuring the power adapter is securely connected, locate the power button – typically on the projector’s top panel or rear. Press the button; the indicator light will illuminate, signifying the projector is starting up. Allow a short initialization period for the lamp to reach optimal brightness.
During startup, the projector may automatically detect connected devices. If not, navigate the menu using the remote control (or onboard buttons if a remote isn’t included – some V08 models are sold without). The initial boot sequence may prompt you to select a language or input source. Ensure the keystone correction is adjusted to square the image if necessary. A clear, bright image indicates successful initial setup. Remember to consult the remote control section for compatibility details with Blitzwolf, 3Stone, and WEWATCH remotes.
Connecting Devices via USB
USB connectivity on your TMY projector allows for direct media playback from USB flash drives or external hard drives. Locate the USB port(s) – typically on the projector’s side or rear panel. Insert your USB device into the port.
Using the remote control or onboard buttons, navigate to the “Source” or “Input” menu. Select “USB” as the input source. The projector will scan the USB device for compatible media files (typically image, video, and audio formats). A file browser will appear, allowing you to select and play your desired content.
Ensure your USB device is formatted with a file system compatible with the projector (FAT32 or exFAT are generally supported). Some projectors may have limitations on the maximum USB drive capacity supported. For optimal performance, use a USB 2.0 or 3.0 device.
Connecting to Smartphones, Tablets & PCs
Connecting your smartphone, tablet, or PC to your TMY projector expands viewing options. Utilize a USB cable for a direct connection – select the corresponding USB input on the projector after connecting. Alternatively, wireless connectivity via Wi-Fi mirroring (screen mirroring) is often supported.
For screen mirroring, ensure both your device and the projector are connected to the same Wi-Fi network. Access the screen mirroring settings on your device (e.g., Miracast for Android, AirPlay for iOS). Select your TMY projector from the list of available devices.
PCs can connect via HDMI for a stable, high-quality connection. Some TMY models may also support wireless display technologies. Adjust the projector’s input source accordingly. Ensure appropriate display settings on your device for optimal resolution and aspect ratio.
Connecting to TV Sticks
Enhance your TMY projector’s functionality by connecting a TV stick (like Roku, Amazon Fire Stick, or Chromecast). These devices provide access to a vast library of streaming services and apps directly on the big screen. Connection is typically achieved via the HDMI port on your TMY projector.
Simply plug the TV stick into an available HDMI port. Use the projector’s input source selection to choose the correct HDMI channel. The TV stick will power on and guide you through its initial setup process, which usually involves connecting to your Wi-Fi network.
Ensure the TV stick’s resolution settings match your projector’s native resolution (1080P for supported models) for the best picture quality. Utilize the TV stick’s remote to navigate and control content. Enjoy seamless streaming!
Understanding Projector Specifications
Key specifications define your TMY projector’s performance. Understanding these helps optimize your viewing experience. Lumens, measured at 7500 for many TMY models, indicate brightness – higher lumens are better for rooms with ambient light. However, perceived brightness also depends on screen size and room darkness.
Resolution is crucial; TMY projectors support 1080P Full HD, delivering sharp, detailed images. This means 1920×1080 pixels are displayed. Lower resolutions will appear less clear. LCD technology is employed in TMY projectors, providing vibrant colors and good contrast.
Pay attention to the aspect ratio (typically 16:9) and contrast ratio (higher is better for deeper blacks). The lamp life indicates how long the projector’s light source will last before needing replacement. These specs ensure informed usage.
Lumens and Brightness (7500 Lumens Explained)
Lumens measure the total amount of visible light emitted by a projector. A TMY projector boasting 7500 lumens promises a bright image, suitable for various viewing environments. However, it’s crucial to understand that perceived brightness isn’t solely determined by this number.
7500 lumens is considered bright, capable of overcoming moderate ambient light. For a completely dark room, a lower lumen count might suffice. Conversely, in a brightly lit room, 7500 lumens will provide a more watchable picture. Screen size significantly impacts brightness; larger screens require more lumens.
Consider the projection surface. A white wall reflects less light than a dedicated projector screen. Marketing lumens can sometimes be inflated, so real-world performance may vary. Ultimately, 7500 lumens offers versatility for diverse viewing conditions with your TMY projector.
Resolution: 1080P Full HD Support
1080P (1920×1080 pixels) is a Full HD resolution, delivering a significantly sharper and more detailed image compared to lower resolutions like 720p. Your TMY projector’s 1080P support ensures a high-quality viewing experience for movies, games, and presentations.
This resolution means that the projected image contains over two million pixels, resulting in finer details and richer colors. When connecting devices, ensure they also support 1080P to fully utilize the projector’s capabilities. Streaming services and Blu-ray discs are excellent sources of 1080P content.
While 4K resolution is emerging, 1080P remains a popular and cost-effective choice, offering a substantial improvement over standard definition. The TMY projector provides a clear, vibrant picture with 1080P, making it ideal for home entertainment and beyond.
LCD Technology in TMY Projectors
TMY projectors utilize Liquid Crystal Display (LCD) technology to produce images. This technology involves passing light through liquid crystals, which are manipulated by electrical fields to create varying levels of brightness and color. LCD is known for its vibrant color reproduction and relatively low cost, making it a popular choice for portable projectors.
Compared to other projection technologies like DLP, LCD generally offers excellent color accuracy and contrast. The TMY V58 and V08 models benefit from this, delivering a visually appealing experience. However, LCD panels can sometimes exhibit lower native contrast ratios than DLP, though advancements are continually improving this aspect.
The LCD panels in TMY projectors are designed to provide a bright and clear image, even in moderately lit environments. This technology contributes to the projector’s overall performance and makes it suitable for various viewing scenarios.
Remote Control Functionality
The TMY projector remote control provides convenient, wireless operation of your device. It allows you to power the projector on/off, adjust volume, navigate menus, select input sources, and control playback without physically accessing the projector itself.
Compatibility is a key feature; the TMY remote is often compatible with remotes designed for Blitzwolf (BW-VP8), 3Stone (A3), and WEWATCH (V10, V10G, V10E, V10 PRO) projectors. This broad compatibility simplifies replacement if your original remote is lost or damaged.
Essential functions include source selection (USB, HDMI, etc.), keystone correction for image adjustment, and picture mode settings. Familiarize yourself with the button layout for optimal control. A fresh set of batteries ensures reliable operation. For detailed instructions, refer to the remote control diagram within this manual.
Remote Control Compatibility (Blitzwolf, 3Stone, WEWATCH)
TMY projectors demonstrate impressive remote control compatibility, extending beyond their dedicated remotes. Users frequently report successful operation with remotes originally designed for Blitzwolf BW-VP8, 3Stone A3, and various WEWATCH models including V10, V10G, V10E, and V10 PRO series.
This cross-compatibility offers a significant benefit, providing readily available and affordable replacement options if the original TMY remote is misplaced or malfunctions. It eliminates the need for a specific, potentially hard-to-find remote, simplifying the user experience.
However, full functionality isn’t always guaranteed with third-party remotes. Some advanced features might be limited. Before purchasing a replacement, verify compatibility with your specific TMY model. Online forums and user reviews can provide valuable insights into successful remote pairings.
Troubleshooting Remote Control Issues
Experiencing remote control problems with your TMY projector? First, ensure fresh batteries are installed, correctly oriented. If the issue persists, try re-pairing the remote. Point the remote directly at the projector’s IR receiver and press the power button repeatedly.
Obstructions can interfere with the signal – remove any objects blocking the path between the remote and projector. If using a compatible third-party remote (Blitzwolf, 3Stone, WEWATCH), confirm it’s set to the correct device mode. Some remotes have multiple settings.
Interference from other devices, like fluorescent lights or other IR emitters, can also cause problems. Try relocating the projector or turning off potential sources of interference. If none of these steps resolve the issue, consult the TMY V58/V08 user manual for further assistance or contact customer support.
Troubleshooting Common Issues
Encountering problems with your TMY projector? Let’s address some frequent concerns. No Image Displayed: Verify the power cable is securely connected and the projector is switched on. Check the input source selection – ensure it matches the connected device (USB, HDMI, etc.).
Sound Problems: Confirm the volume isn’t muted on both the projector and the source device. Test with different audio sources to isolate the issue. Check the audio output settings within the projector’s menu.
Connectivity Issues: For USB connections, try a different USB port or cable. With Wi-Fi, ensure you’ve entered the correct password and the projector is within range of the router. Restarting both the projector and the connected device often resolves temporary glitches. Refer to the full manual for detailed steps and advanced troubleshooting.
No Image Displayed
Experiencing a blank screen with your TMY projector? Several factors could be at play. First, confirm power – ensure the projector and the source device are both switched on and properly plugged in. Next, verify the input source selected on the projector matches the device you’re connecting (HDMI 1, USB, etc.).
Check the cable connections; a loose or faulty HDMI or USB cable can prevent signal transmission. Try a different cable to rule out a cable issue. Also, test with another device to determine if the problem lies with the projector or the original source. If using a TV stick, ensure it’s receiving power and connected to Wi-Fi.
Finally, review the projector’s lamp status (if applicable) and consult the full manual for reset instructions or further diagnostic steps.
Sound Problems

Encountering audio issues with your TMY projector? Begin by checking the volume level on both the projector itself and the connected source device (smartphone, PC, TV stick). Ensure the projector isn’t muted. Verify the audio output setting on your source device is directed to the projector – sometimes it defaults to internal speakers.
If using external speakers, confirm the audio cable (typically a 3.5mm audio jack or HDMI ARC) is securely connected to both the projector and the speakers. Try a different cable to eliminate a faulty connection. Test different audio sources (e.g., a different video or music file) to isolate the problem.
Explore the projector’s audio menu for settings like equalization or surround sound, which might be affecting the output. A factory reset of the audio settings could also resolve the issue.
Connectivity Issues (USB, Wi-Fi)
Experiencing trouble connecting devices to your TMY projector? For USB connectivity, ensure the USB drive is formatted in a compatible format (FAT32 is generally recommended). Try a different USB port on the projector, and test with another USB drive to rule out a device issue. Confirm the files on the USB drive are supported by the projector.
Wi-Fi connection problems often stem from incorrect password entry or a weak signal. Double-check the Wi-Fi password and ensure the projector is within range of the router. Restarting both the projector and the router can often resolve temporary connectivity glitches.
Verify the projector’s Wi-Fi settings are configured correctly, and consider updating the projector’s firmware if available, as updates often include improved connectivity support. If issues persist, try connecting to a different Wi-Fi network.
Maintenance and Care
Proper maintenance extends the life of your TMY projector. Regularly cleaning the projector lens is crucial for optimal image quality. Use a soft, lint-free cloth – never abrasive cleaners or liquids. Gently wipe the lens in a circular motion to remove dust and smudges.
Avoid exposing the projector to extreme temperatures or humidity. When not in use, store your TMY projector in a cool, dry place, ideally in its original packaging or a protective case. Ensure the ventilation slots are not blocked during storage to prevent heat buildup.
Periodically check the cooling fan for dust accumulation and carefully clean it with compressed air if necessary. Avoid disassembling the projector beyond the recommended cleaning procedures, as this may void the warranty.
Cleaning the Projector Lens

Maintaining a clean lens is vital for a clear, bright image from your TMY projector. Dust, fingerprints, and smudges significantly reduce picture quality; For routine cleaning, power off the projector and allow it to cool completely before proceeding.
Use only a soft, lint-free microfiber cloth. Avoid using paper towels, tissues, or abrasive materials, as these can scratch the delicate lens surface. Gently wipe the lens in a circular motion, starting from the center and working outwards.
If stubborn smudges persist, lightly dampen the cloth with a lens cleaning solution specifically designed for optics. Never spray liquid directly onto the lens! Apply a small amount to the cloth first. Ensure the lens is completely dry before powering on the projector.
Proper Storage of Your TMY Projector
When not in use, proper storage extends the life of your TMY projector. Always allow the projector to cool completely before storing it. This prevents potential damage from residual heat.
Store the projector in a cool, dry place, away from direct sunlight, extreme temperatures, and humidity. The original packaging is ideal, providing cushioning and protection from dust. If the original packaging isn’t available, use a soft, padded case or wrap the projector in a protective cloth.
Avoid storing the projector in areas prone to vibrations or impacts. Keep the lens cap securely in place to prevent dust accumulation and scratches. Periodically check the stored projector to ensure no moisture has accumulated. Following these guidelines will ensure your TMY projector remains in optimal condition for years to come.